Hey everyone, I hope you’re having an amazing day today. Today, I’m gonna show you how to prepare a special dish, grilled fajitas. It is one of my favorites. This time, I am going to make it a little bit unique. This is gonna smell and look delicious.
Grilled Fajitas is one of the most popular of current trending foods on earth. It’s easy, it is fast, it tastes yummy. It’s appreciated by millions every day. Grilled Fajitas is something that I’ve loved my entire life. They are nice and they look fantastic.
Today I will be showing you a simple grilled steak fajita recipe on the weber kettle. Get you coals screaming hot and lets grill fast. We're making chicken fajitas easier and with better flavor thanks to the Traeger Cast Iron Fajita Plate.
To get started with this particular recipe, we must prepare a few components. You can cook grilled fajitas using 12 ingredients and 10 steps. Here is how you can achieve it.
The ingredients needed to make Grilled Fajitas:
- Prepare 3 lb steak or chicken breast
- Prepare 3 bell peppers (color doesn't matter)
- Take 2 red onion
- Prepare 6 fresh garlic clove finely minced
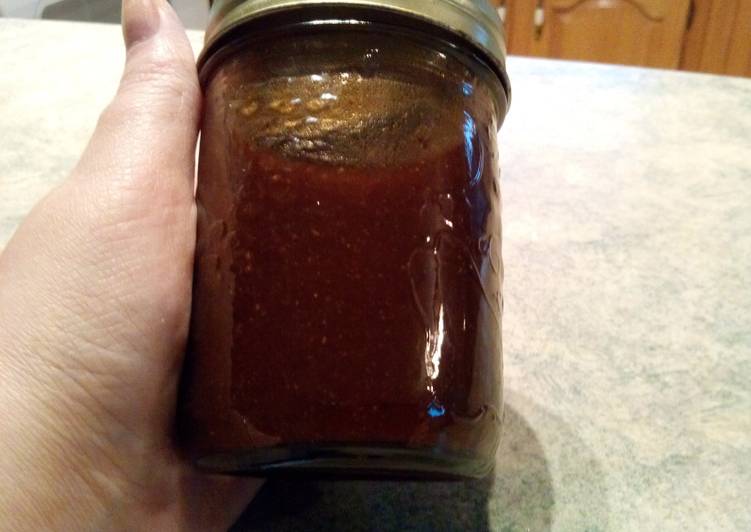
- Get 1 jar pace picante sauce
- Make ready 3 oz tequilla
- Get 16 burrito tortilla shells
- Prepare shredded cheese
- Prepare sour cream (optional)
- Prepare rice (optional)
- Take guacamole (optional)
- Take 3 oz lime juice
While fajitas are more commonly made with skirt steak, flank steak makes a fantastic filling as well. Surprise your family with sizzling, restaurant-quality fajitas! A spicy marinade fabulously flavors shrimp. These hearty beef fajitas are made easy by using a countertop contact grill (rhymes with "Shmeorge Shmoreman"; essentially a panini.
Instructions to make Grilled Fajitas:
- Take your choice of meat and place it in a large bowl or plastic bag along with the garlic, picante sauce, lime juice and tequila.
- Cut the bell pepper in half and clean out the hearts and place in the bowl with the meat.
- Slice the red onion into 1/4" slices and place in the bowl with the meat and peppers.
- Let the meat, peppers and onions marinade for 2 to 24 hours, flipping the bowl over periodically to make sure everything is covered.
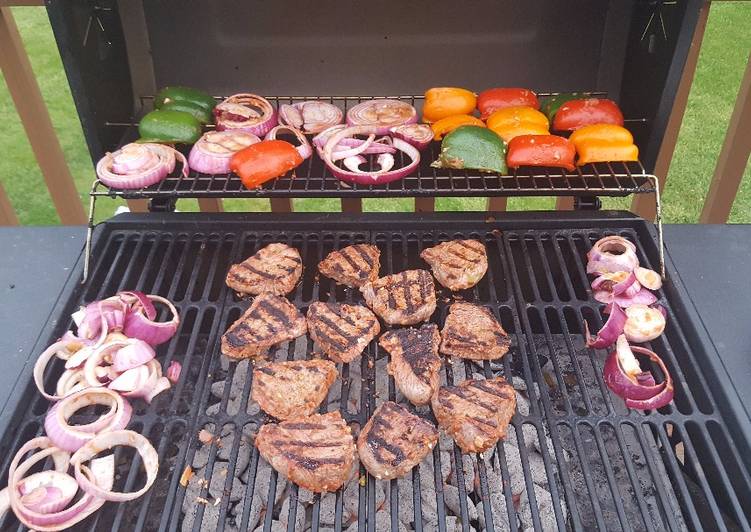
- Once marinaded, remove the meat, peppers, and onions from the marinade, and place them on a grill. Cook the peppers & onions with indirect heat, while the meat cooks over the direct heat. I cook the steak until they are medium to medium well.
- Take the left over marinade, and place it in a sauce pan.
- Once the food is cooked, slice the meat, and peppers into 1/8" strips, and cut the onion slices to desired length. While you are slicing, turn a flame on the sauce pan of marinade. Bring to a boil for 3 minutes and then simmer until you are done slicing. I like this part because I sample as I go for quality control purposes of course.
- Dump the sliced food into a bowl, and combine with the heated marinade. Mix everything well.
- Spoon meat and veggies onto a tortilla shell and add cheese and the optional ingredients.
- Roll the tortilla and enjoy!
Add chicken, fajita seasoning, salt, and olive oil to a gallon-size plastic bag. This version of grilled chicken fajitas is probably my favorite grilling recipe of all time. It's what we use each spring to kick The combination of marinating and grilling is key to tender, flavorful chicken here. Fajita set for your grill, includes pre-seasoned cast iron fajita skillet, wooden serving tray and Serve piping hot food from grill to table. A Cuisinart Pre-Seasoned Cast Iron Grilled Fajita Set makes it.
So that is going to wrap it up for this special food grilled fajitas recipe. Thanks so much for your time. I’m confident you can make this at home. There’s gonna be interesting food in home recipes coming up. Don’t forget to bookmark this page in your browser, and share it to your loved ones, colleague and friends. Thank you for reading. Go on get cooking!