Hello everybody, hope you are having an amazing day today. Today, I’m gonna show you how to prepare a distinctive dish, with skin on kabocha squash gnocchi fresh pasta. One of my favorites food recipes. For mine, I will make it a little bit tasty. This is gonna smell and look delicious.
Because kabocha squash is a pretty starchy squash, it does not give off much water, and therefore the gnocchi dough is surprisingly easy to handle. I bet kabocha gnocchi is much easier to make than pumpkin gnocchi, which would probably yield a much wetter dough. Make the gnocchi: In a large bowl, run the squash.
With Skin on Kabocha Squash Gnocchi Fresh Pasta is one of the most favored of current trending meals on earth. It is simple, it’s quick, it tastes yummy. It’s enjoyed by millions daily. They’re fine and they look wonderful. With Skin on Kabocha Squash Gnocchi Fresh Pasta is something that I’ve loved my entire life.
To get started with this particular recipe, we have to first prepare a few ingredients. You can cook with skin on kabocha squash gnocchi fresh pasta using 2 ingredients and 5 steps. Here is how you cook that.
The ingredients needed to make With Skin on Kabocha Squash Gnocchi Fresh Pasta:
- Make ready 100 grams Kabocha squash
- Prepare 30 grams Cake flour
Also called the kabocha squash, this Japanese pumpkin has the sweetest flavor with a rich, fluffy texture that's similar to a cross between a sweet potato and a pumpkin. Kabocha Squash Gnocchi - Tiny Urban Kitchen. Kabocha has peaked my interesting lately. There's been a lot of blog posts about kabocha squash - from No Recipe's award winning kabocha pumpkin cream cake to Gourmet Fury's Canadian Chimichurri Pork Cheeks with Kabocha Parsnip Puree.
Steps to make With Skin on Kabocha Squash Gnocchi Fresh Pasta:
- Cook the kabocha squash (wrap it with plastic wrap and microwave it at 500W for 5 minutes). With a fork, mash the kabocha squash with the peel, and mix it with the flour.
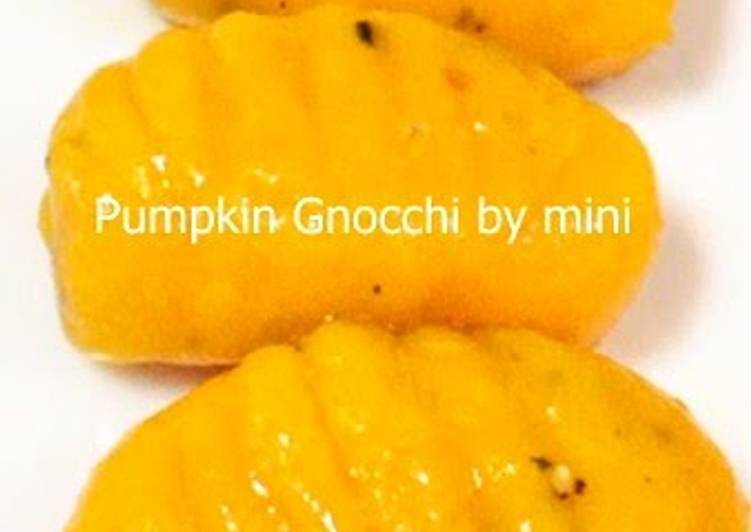
- Roll it out to 1.5 cm diameter dowel, and cut it into 3 cm long pieces (you should be able to cut it into equal pieces). Use a fork to press a concave shape into each piece.
- You can press the dough gently onto a makisu (sushi mat) to easily imprint the pattern.
- Prepare the sauce. Boil the water until bubbly and cook the gnocchi for 30 seconds to 1 minutes over medium heat, and it is done. (Helpful hint: Scoop them up when they float tp the surface. If you cook them for too long, they will fall apart).
- Take advantage of the sweetness of the kabocha squash, add some butter and olive oil (1 teaspoon each), season with salt and pepper only. The garnish is baked cheese. The freshly cooked kabocha squash gnocchi is exquisite.
Kabocha squash, botanically classified as Cucurbita maxima, is a sweet squash variety that is a member of the Cucurbitaceae family along with gourds and For ease in cutting, the squash can first be microwaved for a few minutes to soften and can then be cooked with or without the skin. I'd had gnocchi on the brain after reading Carey's beautiful post on curry-spiced kabocha squash I always make this with homemade winter squash puree; my favorite is equal parts butternut and Finish the gnocchi: Bring a medium saucepan half filled with water to a boil. Transfer steamed squash to a bowl; mash with a fork or. Italian pumpkin gnocchi dumplings made with pumpkin or winter squash, ricotta cheese, parmesan and flour. What keeps these gnocchi fluffy are the ricotta cheese and a light hand with the flour.
So that is going to wrap it up with this exceptional food with skin on kabocha squash gnocchi fresh pasta recipe. Thank you very much for reading. I am confident that you will make this at home. There is gonna be interesting food in home recipes coming up. Remember to save this page in your browser, and share it to your loved ones, colleague and friends. Thank you for reading. Go on get cooking!